为了让聊天机器人能够处理其自身知识库之外的查询(例如,询问最近发生的事件),我们可以为其集成一个网页搜索工具。这样,机器人就能利用这个工具查找相关信息,从而提供更准确、更全面的回答。
💡 注意 本教程基于 构建一个基本的聊天机器人 的代码进行扩展。
准备工作
在开始之前,请确保你拥有 Tavily 搜索引擎 的 API 密钥。
第一步:安装与配置搜索工具
首先,安装使用 Tavily 搜索引擎所需的依赖包。
pip install -U langchain-tavily
然后,在你的环境中配置 API 密钥。
import os

os.environ["TAVILY_API_KEY"] = "tvly-..." # 替换为你的 Tavily API 密钥
第二步:定义工具
接下来,我们定义一个网页搜索工具。这里我们使用 TavilySearch,并设置 max_results=2,表示每次搜索最多返回两个结果。
API 参考: TavilySearch
from langchain_tavily import TavilySearch

# 定义工具
tool = TavilySearch(max_results=2)
tools = [tool]

# 我们可以测试一下工具是否正常工作
tool.invoke("LangGraph 中的 'node' 是什么?")
工具调用成功后会返回一个包含页面摘要的 JSON 对象,我们的聊天机器人可以利用这些信息来回答问题:
{
  "query": "What's a 'node' in LangGraph?",
  "results": [
    {
      "title": "Introduction to LangGraph: A Beginner's Guide - Medium",
      "url": "https://medium.com/@cplog/introduction-to-langgraph-a-beginners-guide-14f9be027141",
      "content": "Stateful Graph: LangGraph revolves around the concept of a stateful graph, where each node in the graph represents a step in your computation, and the graph maintains a state that is passed around and updated as the computation progresses...",
      "score": 0.7065353
    },
    {
      "title": "LangGraph Tutorial: What Is LangGraph and How to Use It?",
      "url": "https://www.datacamp.com/tutorial/langgraph-tutorial",
      "content": "LangGraph is a library within the LangChain ecosystem that provides a framework for defining, coordinating, and executing multiple LLM agents (or chains) in a structured and efficient manner...",
      "score": 0.5008063
    }
  ],
  "response_time": 1.38
}
第三步:定义图 (Graph)
在上一篇教程创建的 StateGraph 基础上,我们需要对 LLM 进行一项重要修改:调用 .bind_tools() 方法。这个方法的作用是告知 LLM 它有哪些可用的工具以及调用这些工具时应遵循的 JSON 格式。
首先,选择并初始化你想要使用的 LLM:
OpenAI
pip install -U "langchain[openai]"
    import os
    from langchain.chat_models import init_chat_model

    os.environ["OPENAI_API_KEY"] = "sk-..."

    llm = init_chat_model("openai:gpt-4o")
Anthropic
pip install -U "langchain[anthropic]"
    import os
    from langchain.chat_models import init_chat_model

    os.environ["ANTHROPIC_API_KEY"] = "sk-..."

    llm = init_chat_model("anthropic:claude-3-5-sonnet-latest")
Azure
pip install -U "langchain[openai]"
    import os
    from langchain.chat_models import init_chat_model

    os.environ["AZURE_OPENAI_API_KEY"] = "..."
    os.environ["AZURE_OPENAI_ENDPOINT"] = "..."
    os.environ["OPENAI_API_VERSION"] = "2024-05-01-preview"

    llm = init_chat_model(
        "azure_openai:gpt-4o",
        azure_deployment=os.environ["AZURE_OPENAI_DEPLOYMENT_NAME"],
    )
Google Gemini
pip install -U "langchain[google-genai]"
    import os
    from langchain.chat_models import init_chat_model

    os.environ["GOOGLE_API_KEY"] = "..."

    llm = init_chat_model("google_genai:gemini-1.5-flash")
现在,我们将这个绑定了工具的 LLM 集成到 StateGraph 中。
API 参考: StateGraph | START | END | add_messages
from typing import Annotated
from typing_extensions import TypedDict
from langgraph.graph import StateGraph, START, END
from langgraph.graph.message import add_messages

class State(TypedDict):
    messages: Annotated[list, add_messages]

graph_builder = StateGraph(State)

# 关键修改:将工具绑定到 LLM
llm_with_tools = llm.bind_tools(tools)

def chatbot(state: State):
    return {"messages": [llm_with_tools.invoke(state["messages"])]}

graph_builder.add_node("chatbot", chatbot)
第四步:创建工具执行节点
当 LLM 决定调用工具时,我们需要一个节点来实际执行这些工具。我们创建一个名为 BasicToolNode 的新节点,它会检查状态中最新的消息,如果消息包含 tool_calls,就执行相应的工具。这个功能依赖于 LLM 的 tool_calling 支持,目前 Anthropic, OpenAI, Google Gemini 等主流模型都已支持。
API 参考: ToolMessage
import json
from langchain_core.messages import ToolMessage

class BasicToolNode:
    """一个运行上一条 AI 消息中请求的工具的节点。"""
    def __init__(self, tools: list) -> None:
        self.tools_by_name = {tool.name: tool for tool in tools}

    def __call__(self, inputs: dict):
        if messages := inputs.get("messages", []):
            message = messages[-1]
        else:
            raise ValueError("输入中未找到消息")

        outputs = []
        for tool_call in message.tool_calls:
            tool_result = self.tools_by_name[tool_call["name"]].invoke(
                tool_call["args"]
            )
            outputs.append(
                ToolMessage(
                    content=json.dumps(tool_result, ensure_ascii=False),
                    name=tool_call["name"],
                    tool_call_id=tool_call["id"],
                )
            )
        return {"messages": outputs}

tool_node = BasicToolNode(tools=tools)
graph_builder.add_node("tools", tool_node)
💡 注意 LangGraph 提供了预构建的
ToolNode,未来你可以直接使用它来简化开发,无需自己编写这个类。
第五步:定义条件边 (Conditional Edges)
有了工具节点后,我们需要定义条件边 (Conditional Edges) 来实现智能路由。
边 (Edges) 负责将控制流从一个节点导向下一个节点。而条件边则可以根据当前图的状态(state)来决定下一步应该跳转到哪个节点。它通常包含 “if” 判断,并返回一个或多个目标节点的名称。
我们定义一个名为 route_tools 的路由函数,它检查 chatbot 节点的输出中是否包含 tool_calls。我们通过 add_conditional_edges 将这个函数添加到图中,告诉图在 chatbot 节点完成后,调用此函数来决定下一步的走向。
- 如果存在工具调用,则路由到
tools节点。 - 如果没有,则直接路由到
END,结束对话。
def route_tools(state: State):
    """
    用于条件边,判断上一条消息中是否包含工具调用。
    如果包含,则路由到 'tools' 节点;否则,路由到终点。
    """
    if messages := state.get("messages", []):
        ai_message = messages[-1]
    else:
        raise ValueError(f"在状态中未找到消息: {state}")

    if hasattr(ai_message, "tool_calls") and len(ai_message.tool_calls) > 0:
        return "tools"
    return END

# 添加从 "chatbot" 节点出发的条件边
graph_builder.add_conditional_edges(
    "chatbot",
    route_tools,
    # 字典将路由函数的输出映射到具体的节点名称
    {"tools": "tools", END: END},
)

# 添加从 "tools" 节点返回 "chatbot" 的边
graph_builder.add_edge("tools", "chatbot")
# 设置入口点
graph_builder.add_edge(START, "chatbot")

# 编译图
graph = graph_builder.compile()
💡 注意 你也可以使用 LangGraph 预构建的
tools_condition函数来替代route_tools,使代码更简洁。
第六步:可视化并测试机器人
我们可以使用 get_graph().draw_mermaid_png() 来可视化我们构建的图的结构。
from IPython.display import Image, display

try:
    display(Image(graph.get_graph().draw_mermaid_png()))
except Exception:
    # 这需要一些额外的依赖,是可选步骤
    pass
现在,可以向机器人提问一些超出其训练数据范围的问题了。
while True:
    user_input = input("User: ")
    if user_input.lower() in ["quit", "exit", "q"]:
        print("Goodbye!")
        break

    # 流式输出事件
    for event in graph.stream({"messages": [("user", user_input)]}):
        for value in event.values():
            print("Assistant:", value["messages"][-1].content)
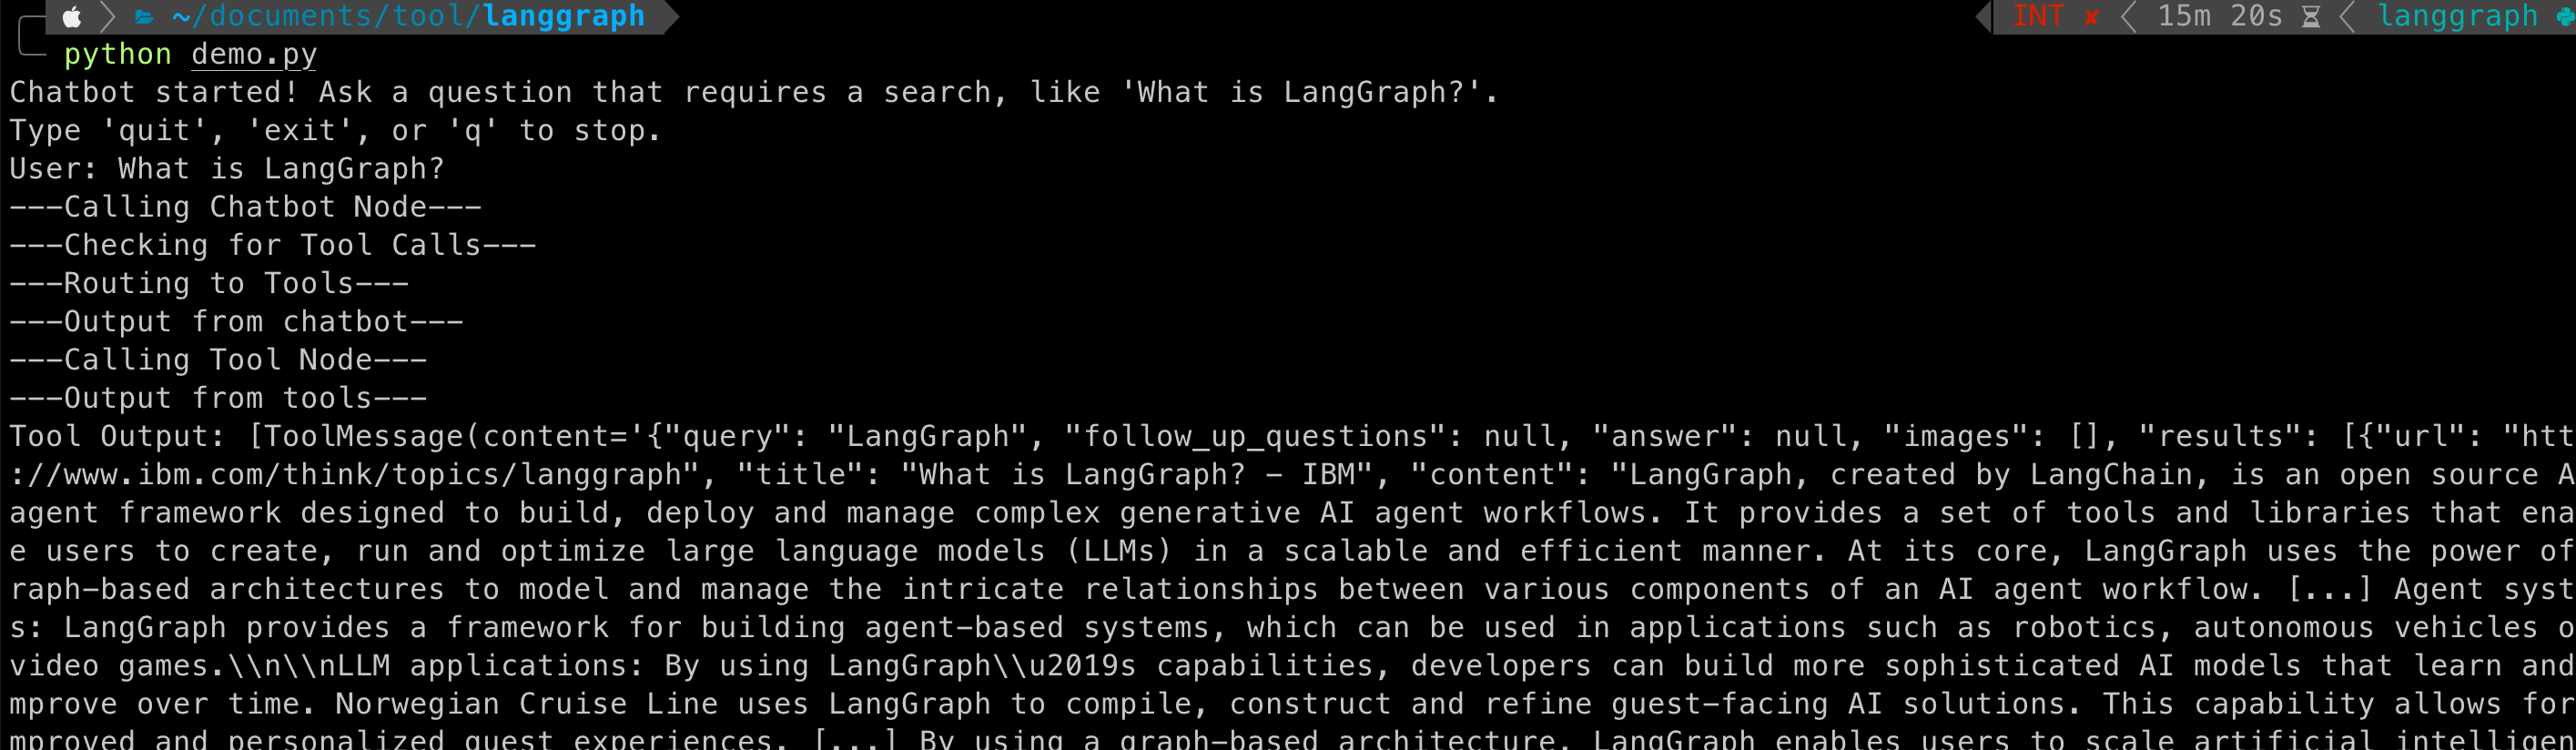
运行示例:
User: What do you know about LangGraph?
Assistant:
Assistant: [{"name": "tavily_search_results_json", "args": {"query": "LangGraph AI tool information"}, "id": "toolu_..."}]
Assistant: [{"url": "https://github.com/langchain-ai/langgraph", "content": "Overview. LangGraph is a library for building stateful, multi-actor applications with LLMs..."}, {"url": "https://python.langchain.com/docs/langgraph/", "content": "LangGraph is a library for building stateful, multi-actor applications with LLMs..."}]
Assistant: LangGraph is a powerful library from the LangChain ecosystem designed for building stateful, multi-actor applications using Large Language Models (LLMs). Here are some key points based on the information I found:

1.  **Purpose**: It's used to create complex workflows, especially for AI agents and multi-agent systems.
2.  **Stateful Nature**: A core concept is the "stateful graph", where each node represents a computation step, and a shared state is passed and updated between nodes.
3.  **Key Features**:
    *   **Cycles**: It supports cyclical flows, which is essential for most agent-like behaviors where reasoning or tool use might require iterative steps.
    *   **Controllability**: It gives developers fine-grained control over the application's logic and flow.
    *   **Persistence**: It allows for saving and resuming the state of the graph, enabling long-running or interruptible tasks.

In essence, LangGraph simplifies the development of complex LLM applications by providing a structured way to manage state and coordinate interactions between different components or agents.
你可以通过这个 LangSmith trace 查看 Agent 运行的每一步细节。
运行结果
源码:
import os
import json
from typing import Annotated
from typing_extensions import TypedDict

from langgraph.graph import StateGraph, START, END
from langgraph.graph.message import add_messages
from langchain_core.messages import ToolMessage, BaseMessage
# 1. Import the correct model class
from langchain_google_genai import ChatGoogleGenerativeAI
from langchain_tavily import TavilySearch

# --- API Key Setup (Ignoring security for this test as requested) ---
os.environ["TAVILY_API_KEY"] = ""
os.environ["GOOGLE_API_KEY"] = ""


# --- Tool Definition ---
tavily_tool = TavilySearch(max_results=2)
tools = [tavily_tool]


# --- Model Initialization ---
# 2. Use the modern way to initialize the model with a valid model name
llm = ChatGoogleGenerativeAI(model="gemini-2.5-flash")
# Bind the tools to the LLM
llm_with_tools = llm.bind_tools(tools)


# --- Graph State Definition ---
class State(TypedDict):
    messages: Annotated[list, add_messages]


# --- Graph Node Definitions ---

def chatbot(state: State) -> dict:
    """
    This node invokes the LLM with tools.
    The LLM can decide to either respond directly or call a tool.
    """
    print("---Calling Chatbot Node---")
    # 3. CRITICAL FIX: Use the 'llm_with_tools' object here, not the plain 'llm'.
    # This allows the model to see and decide to use the tools.
    response = llm_with_tools.invoke(state["messages"])
    return {"messages": [response]}


class BasicToolNode:
    """A node that runs the tools requested in the last AIMessage."""
    def __init__(self, tools: list) -> None:
        self.tools_by_name = {tool.name: tool for tool in tools}

    def __call__(self, inputs: dict) -> dict:
        """
        Executes the requested tools and returns the results.
        """
        print("---Calling Tool Node---")
        messages = inputs.get("messages", [])
        if not messages or not hasattr(messages[-1], "tool_calls"):
            return {}

        message = messages[-1]
        outputs = []
        for tool_call in message.tool_calls:
            try:
                tool_result = self.tools_by_name[tool_call["name"]].invoke(tool_call["args"])
                outputs.append(
                    ToolMessage(
                        content=json.dumps(tool_result),
                        name=tool_call["name"],
                        tool_call_id=tool_call["id"],
                    )
                )
            except Exception as e:
                print(f"Error executing tool {tool_call['name']}: {e}")
        return {"messages": outputs}


def route_tools(state: State) -> str:
    """
    This function decides the next step after the chatbot node.
    If the LLM requested a tool, it routes to the 'tools' node.
    Otherwise, it ends the graph execution.
    """
    print("---Checking for Tool Calls---")
    last_message = state["messages"][-1]
    if hasattr(last_message, "tool_calls") and len(last_message.tool_calls) > 0:
        print("---Routing to Tools---")
        return "tools"
    print("---Routing to End---")
    return END


# --- Graph Construction ---
graph_builder = StateGraph(State)

# Add nodes to the graph
graph_builder.add_node("chatbot", chatbot)
tool_node = BasicToolNode(tools=tools)
graph_builder.add_node("tools", tool_node)

# Define the graph's flow
graph_builder.add_edge(START, "chatbot")

# Add the conditional edge for routing
graph_builder.add_conditional_edges(
    "chatbot",
    route_tools,
    {"tools": "tools", END: END},
)
graph_builder.add_edge("tools", "chatbot")

# 4. Removed the redundant 'add_edge(START, "chatbot")'

# Compile the graph
graph = graph_builder.compile()


# --- Run the Chatbot ---
def run_chatbot():
    print("Chatbot started! Ask a question that requires a search, like 'What is LangGraph?'.")
    print("Type 'quit', 'exit', or 'q' to stop.")
    while True:
        try:
            user_input = input("User: ")
            if user_input.lower() in ["quit", "exit", "q"]:
                print("Goodbye!")
                break

            # Stream the graph execution
            for event in graph.stream({"messages": [("user", user_input)]}):
                for node_name, value in event.items():
                    print(f"---Output from {node_name}---")
                    # Only print the final assistant message to avoid clutter
                    if node_name == "chatbot" and not value['messages'][-1].tool_calls:
                         print("Assistant:", value["messages"][-1].content)
                    elif node_name == "tools":
                        print("Tool Output:", value['messages'])


        except (KeyboardInterrupt, EOFError):
            print("\nGoodbye!")
            break
        except Exception as e:
            print(f"An error occurred: {e}")
            # Uncomment the line below for detailed error tracing
            # import traceback; traceback.print_exc()

if __name__ == "__main__":
    run_chatbot()
第七步:使用预构建组件简化代码
为了提高开发效率,我们可以用 LangGraph 的预构建组件替换我们自己编写的部分。这些预构建组件通常还包含并行 API 执行等优化功能。
BasicToolNode替换为预构建的ToolNoderoute_tools替换为预构建的tools_condition
import os
import json
from typing import Annotated

from langchain_google_genai import ChatGoogleGenerativeAI
from langchain_tavily import TavilySearch
from langchain_core.messages import BaseMessage
from typing_extensions import TypedDict

from langgraph.graph import StateGraph, START
from langgraph.graph.message import add_messages
from langgraph.prebuilt import ToolNode, tools_condition

# --- API Key Setup ---
# This assumes you have set your API keys as environment variables
# export GOOGLE_API_KEY="..."
# export TAVILY_API_KEY="..."

class State(TypedDict):
    messages: Annotated[list, add_messages]

# --- Graph Definition ---
graph_builder = StateGraph(State)

# Setup tools and the LLM
tool = TavilySearch(max_results=2)
tools = [tool]
llm = ChatGoogleGenerativeAI(model="gemini-1.5-flash-latest")
llm_with_tools = llm.bind_tools(tools)

# Define the chatbot node
def chatbot(state: State):
    return {"messages": [llm_with_tools.invoke(state["messages"])]}

# Add nodes to the graph
graph_builder.add_node("chatbot", chatbot)
tool_node = ToolNode(tools=[tool])
graph_builder.add_node("tools", tool_node)

# Define the graph's flow
graph_builder.add_edge(START, "chatbot")
graph_builder.add_conditional_edges(
    "chatbot",
    tools_condition,
)
graph_builder.add_edge("tools", "chatbot")

# Compile the graph
graph = graph_builder.compile()


# --- Run the Chatbot ---
# This is the missing part that starts the conversation loop.
def run_chatbot():
    print("Chatbot started! Ask a question that requires a search, like 'What is LangGraph?'.")
    print("Type 'quit', 'exit', or 'q' to stop.")
    while True:
        try:
            user_input = input("User: ")
            if user_input.lower() in ["quit", "exit", "q"]:
                print("Goodbye!")
                break

            # Stream the graph execution
            for event in graph.stream({"messages": [("user", user_input)]}):
                for node_name, value in event.items():
                    print(f"---Output from {node_name}---")
                    # Only print the final assistant message to avoid clutter
                    if node_name == "chatbot" and not value['messages'][-1].tool_calls:
                         print("Assistant:", value["messages"][-1].content)
                    elif node_name == "tools":
                        print(f"Tool Output: {value['messages'][0].content}")


        except (KeyboardInterrupt, EOFError):
            print("\nGoodbye!")
            break
        except Exception as e:
            import traceback
            print(f"An error occurred: {e}")
            traceback.print_exc()

# This line actually executes the chatbot loop when you run the script.
if __name__ == "__main__":
    run_chatbot()
可以看到,使用预构建组件后,代码变得更加简洁和标准化。
总结与后续步骤
恭喜你! 你已经成功地在 LangGraph 中创建了一个能够使用搜索引擎来获取最新信息的对话式 Agent。现在,它能够处理更广泛的用户查询了。
然而,目前的机器人还无法记住之前的对话内容,这限制了它进行连贯的多轮对话能力。在下一部分,我们将为其添加记忆 (Memory)来解决这个问题。
关于
关注我获取更多资讯